Running Umbraco 9 on your Raspberry Pi
Let's start this post with some massive credits to Carl Sargunar for his pioneering work on getting Umbraco to run on Raspberry Pi.
- Article: Running umbraco on a raspberry pi or how I stopped worrying and learned to love linux
- CodeGarden 2021 talk: Almost OSS Nirvana : Running Umbraco on Linux for fun and profit
Unfortunately Carl ran into the one limitation here: Umbraco 9 only supports SQL server which does not run on ARM, the architecture that Raspberry Pi uses.
Recently I got a hint from colleague Rasmus that maybe SQL Edge could work. Spoiler alert: it did!
Ingredients
- Raspberry Pi 4 Model B with 8 gigs of memory
- 4 gigs might work but I haven't tried, 2 gigs does NOT work, I tried, it crashed the system each time
- A higher quality micro SD card
- I tried using a super cheap SD card and it was not only slow, after a power outage it was also immediately corrupt - quality doesn't need to be expensive, I picked up a 32GB Sandisk Endurance card for less than $10
- An ethernet cable and router to connect it to (I won't cover WiFi)
That's it!
Operating system
SQL Edge requires Docker and the SQL Edge image on Docker requires an ARM64 operating system. The default Raspberry Pi operating system is still 32 bit so we have to install something else.
Using the Raspberry Pi imager we have the option to easily get other compatible operating systems.
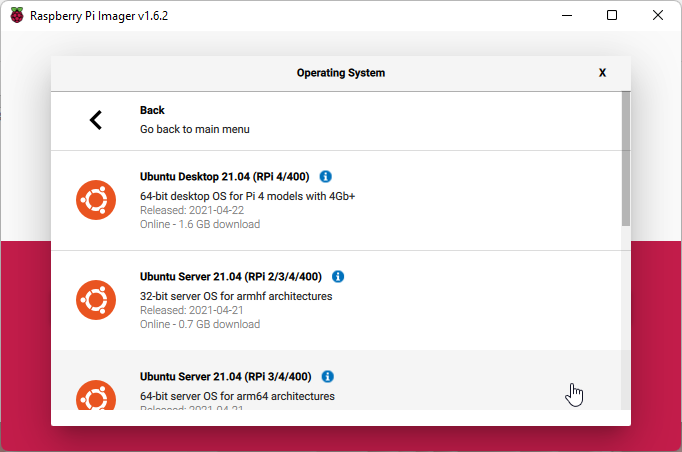
I am familiar with Ubuntu so that was my choice. I also have ran the Ubuntu Desktop version on the Pi and it's.. slow. So to optimize for speed, we're not going to have a graphical desktop environment, we're going command line only. Make sure to choose the 64 bit version of Ubuntu Server.
I didn't have a spare monitor available so I needed to be able to log into the Pi remotely. We can do that by putting a file in the root directory of the SD card that is named ssh. Once the SD card has been written to it will be ejected, so take it out of your computer and put it back in to be able to create that file.
Note: This file HAS to be there before the first boot, so don't skip this step if you want to be able to connect without hooking it up to a screen/keyboard first.
Over to the Pi
Right, we've put the SD card in the Pi and it's booted up. You'll need to find it's IP address in your router. I did say at the top I won't go into WiFi so.. yeah, you definitely will need to put it on wired ethernet at this point.
Once you know the IP you can use the following command to connect:
- ssh ubuntu@192.168.1.236
The prerequisites here are that you have ssh, Windows Terminal comes with it I believe.
Note: the first boot can take 2 or 3 minutes, so keep trying if it fails to connect the first few times.
In this command, ubuntu is the username. Your password the first time is also Ubuntu and you'll be asked immediately to change it. This process looks something like this:
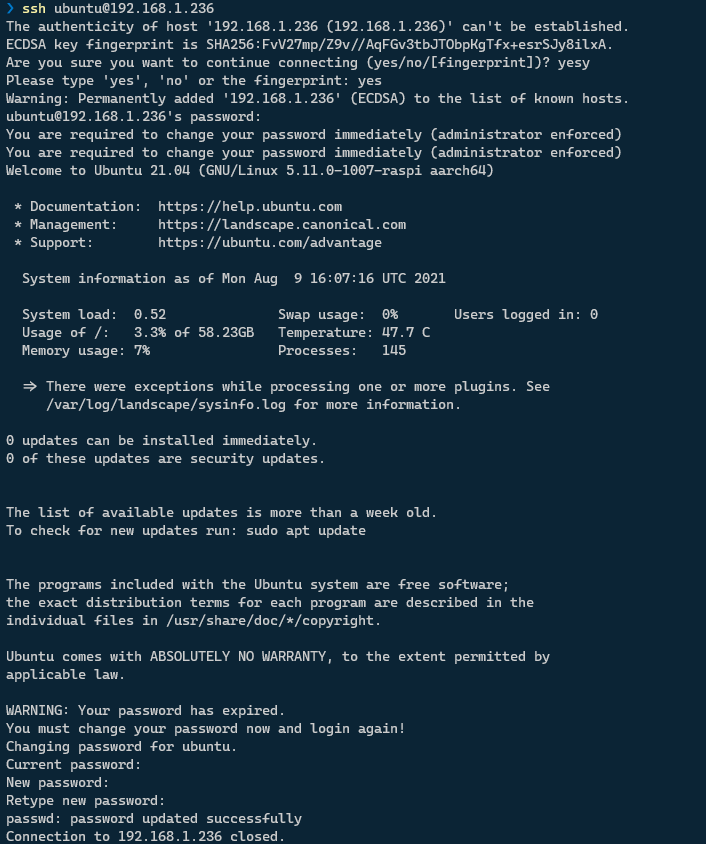
Alright, we've set a password, ready for the next step!
Install Docker and Docker Compose
Docker is needed for SQL Edge to run. I found the excellent blog post Installing Docker and Docker Compose on the Raspberry Pi in 5 Simple Steps and it was not a (total) lie! The only thing is that you will want to prefix all of the commands in this post with 'sudo' else you'll get a lot of "access denied" errors.
The second command 'sudo usermod -aG docker pi' assumes that your username is 'pi' so that needs to be changed, the command that works is: 'sudo usermod -aG docker ubuntu'.
Don't skip the dependences and Docker Compose steps, we need it all.
Install SQL Edge
There we are, on the doorstep of the missing link, a proper SQL Server running on Raspbery Pi. It's so easy now that it almost seems like cheating, there's 2 commands listed on Microsoft's "Disconnected Deployment" page.
The first one gets a copy of SQL Edge that can then be ran on Docker:
- sudo docker pull mcr.microsoft.com/azure-sql-edge:latest
Then the second command starts the docker image:
- sudo docker run --cap-add SYS_PTRACE -e 'ACCEPT_EULA=1' -e 'MSSQL_SA_PASSWORD=yourStrong(!)Password' -p 1433:1433 --name azuresqledge -d mcr.microsoft.com/azure-sql-edge
You will notice the password there.. I just kept it the same. I actually tried to make it 'abc123' but that was not allowed, it was not secure enough. Whereas the default password in all the documentation was accepted. So yeah, security 'ey!
SQL Edge is now starting on port 1433 and it will take a minute or two before you can connect. But after that you can switch to your Windows machine and use SQL Management Studio to connect.
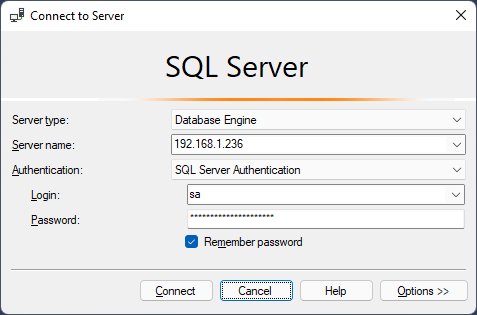
And then create a new database like normal.
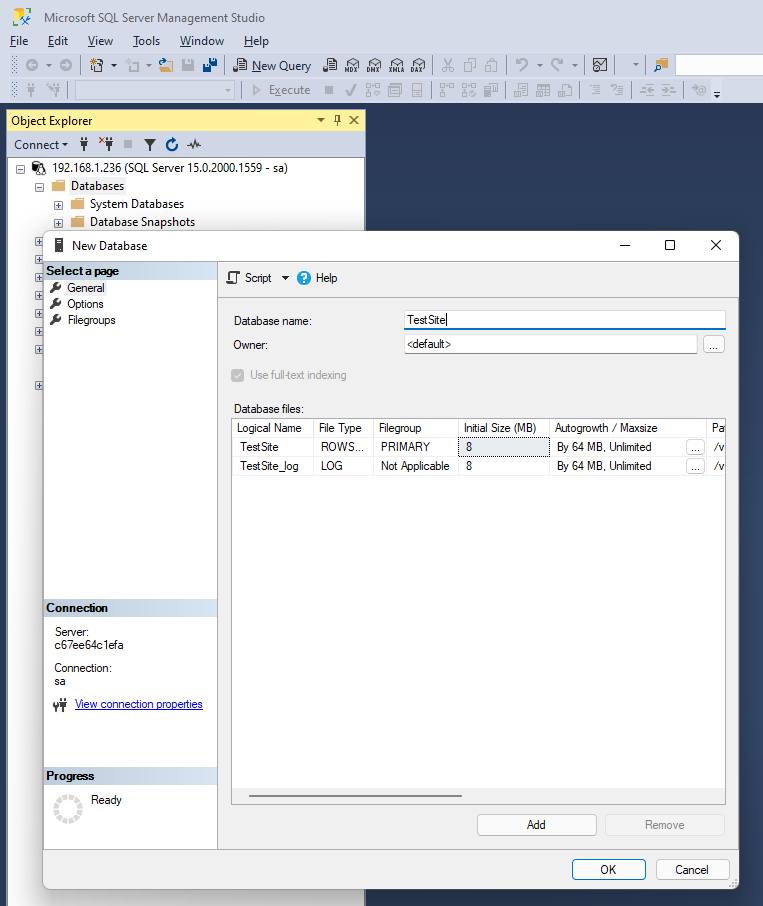
Success! We have an empty database hosted on the Pi, no external service necessary.
In the near future, you might reboot your Pi and wonder how to start SQL server again, the command 'sudo docker start azuresqledge' should get you up and running again.
Install .NET 5
I tried all of the convenient methods to install .NET but they all failed due to them not being made for ARM64 machines, so we have some manual commands to do. These are the latest versions I will list below at the time of writing, make sure to check the Microsoft site for current versions at the time of reading. Click "Arm64" both in the "SDK" section and the "ASP.NET Core Runtime" section for both of the download links you'll need. Then use the following commands with the appropriate links / filenames:
- wget https://download.visualstudio.microsoft.com/download/pr/99d2e2e5-32b0-41e1-982d-82223eab6b8b/e4a5f67ab76a1ba54b6eae853bbdd354/dotnet-sdk-5.0.302-linux-arm64.tar.gz
- wget https://download.visualstudio.microsoft.com/download/pr/36c6210a-5b28-4598-81f7-2cef1a0bd1d5/296782726e68368c8ddf87ba828b5fc7/aspnetcore-runtime-5.0.8-linux-arm64.tar.gz
- sudo mkdir /opt/dotnet
- sudo tar zxf dotnet-sdk-5.0.302-linux-arm64.tar.gz -C /opt/dotnet/
- sudo tar zxf aspnetcore-runtime-5.0.8-linux-arm64.tar.gz -C /opt/dotnet/
- sudo ln -s /opt/dotnet/dotnet /usr/local/bin
- export DOTNET_ROOT=/opt/dotnet/
- export PATH=${PATH}:${DOTNET_ROOT}
Right now we should be able to test this by checking with the command 'dotnet --info', we should see the currently available version of .NET on our Pi.
If you reboot, you'll need to re-apply the last two commands. Instead of that you can edit a file with the command 'nano ~/.bashrc' - scroll all the way to the end and add those two export commands. With CTRL+S, CTRL+X you'll save and exit out of nano.
Creating an Umbraco site
We're so close now! In order to get Umbraco running, there's some excellent documentation on Our Umbraco.
I used the following commands:
- dotnet new -i Umbraco.Templates::9.0.0-rc001
- dotnet new umbraco -n TestSite
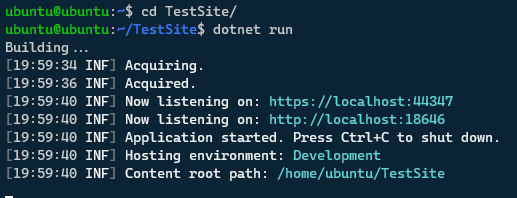
- cd TestSite
- dotnet build
- dotnet run
At this point you will have a URL, woohoo!
Installing and using ngrok
And now we have a huge problem.. localhost is our Ubuntu Server.. the Pi. The one without a Desktop environment, and no graphical browser. Also, it doesn't work to go to the IP and port listed here, the Kestrel server only responds to localhost.
I was to excited to get something working so I couldn't be bothered figuring out nginx or whatever other alternatives I had now. So I took a shortcut: I remembered that ngrok can open up anything to a public URL. Jackpot!
In a new terminal window I log into ssh again and fire of the command to install ngrok:
- sudo snap install ngrok
If this is the first time you're using nrok, you need to create an account on their website to get an authentication token, which you can fill in in the next one-time command:
- ngrok authtoken <your_auth_token>
After that is done we need to fiddle a bit with the port number, the final command I landed on was:
- ngrok http 18646 -host-header="localhost:18646"
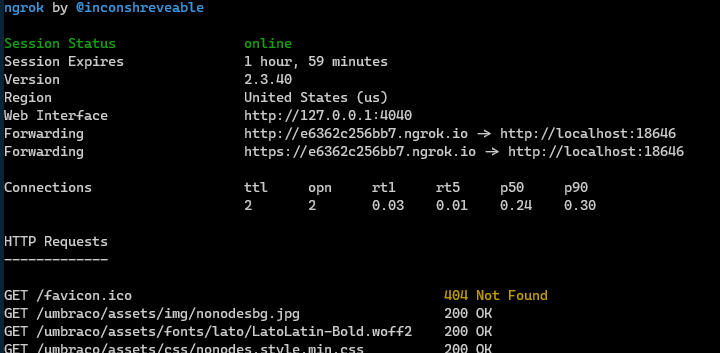
And suddenly we have a usable (public!) URL that proxies whatever localhost:18646 outputs.
Installing Umbraco
The ngrok URL will give us what we've been working for: the Umbraco installer wizard. The first page with username and password is familiar and works fine, however then we get to a slight problem in the database details.
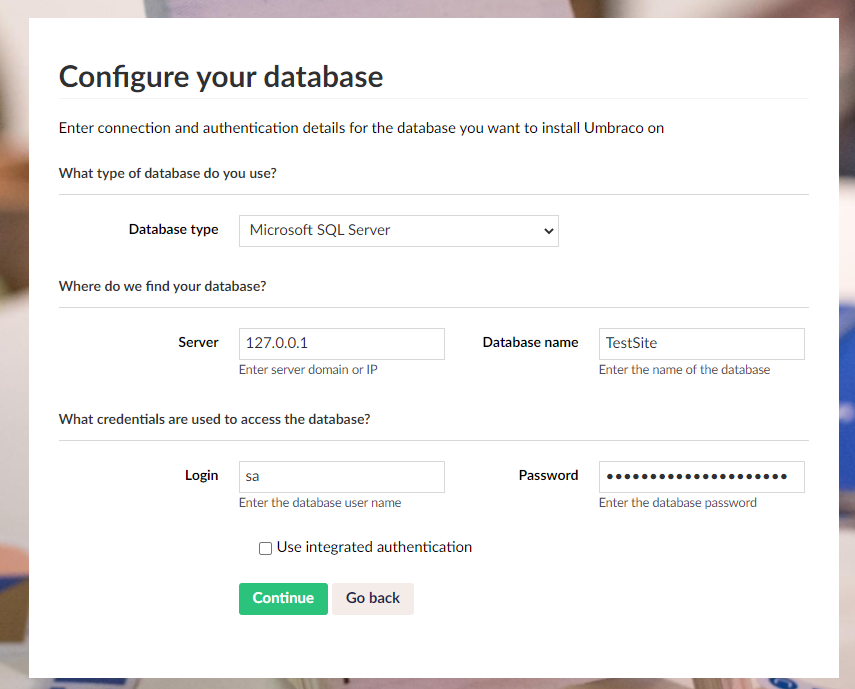
I tried using localhost and 127.0.0.1 as the server here, but in the end the only thing that seemed to work was the IP address I connect to ssh on, so in my case the server became '192.168.1.236'.
A few tense moments later and I see the familiar message flashing by about installing database tables, etc. And there we have it: a fresh Umbraco install running stand-alone on a single Raspberry Pi.
Does it hold up?
When I showed Warren my new Pi site he got curious and threw loader.io at it, with 250 clients/minute for a minute and 250 constant load for a minute. That last one caused a few time-outs on the Products page of The Starterkit. But looking at the server, I could see that by far the most CPU was used by ngrok. So I feel, unscientifically, that it will perform perfectly well for small to medium sites. But we'll have to do some more testing on a different web server. Maybe someone else can write that blog post? *cough*Carl*cough*