Version control in Git - Part 2 (set-up and usage)
So you're ready to start using Git? Here's how to start:
First of all, go and download and install the Git extensions for Windows. The featured (full) release is recommended.
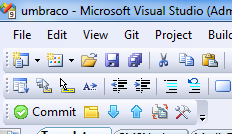
In Visual Studio, you'll now see a few new buttons (in Windows Explorer, there's also some new context items that will show up when you right-click a folder).

As you can see it's a tiny toolbar, click the last icon (settings), you have to set a name and e-mail address, they will be attached to any commit you do.
I've noticed that in order for the toolbar buttons to work, I have to open a file in the solution. So just open one of the files and make sure the cursor is in the file somewhere.
Hit "Ok" and click on the folder icon ("Browse repository"). You'll be presented with a screen with three options, one of which is "Initialize repository".
Initialize the repository in the root directory of your solution, this is typically where your .sln file is. The content in this folder and everything in the subfolders will be under source control. This is also your personal repository, there is not even a central repository yet.
The repository is simply one .git folder in the solution folder.
Almost done!
You're ready to commit your project to the repository. First, make sure you ignore the appropriate files, hit the "edit .gitignore" button and add the default ignores. For me personally, this is all that I need, you might want to tweak it.
Ready. Now you can do your first commit! You can skip the "Add files" button, this will just stage all the files for a commit, you can also do this in the commit screen.
Select all of the files and click "Stage selected files", type a commit message and click "Commit".
This creates the first branche, called master. You're good to go code and make changes. When you're ready to commit again, just use the tiny toolbar button instead of the repository browser.
In the next part of this series, I'll show how to commit the changes to a remote repository using Unfuddle.com.